
Google Drive Full? Some easy steps to free up storage
1Click VPN Team in how-to-guides
21.07.2024 | 4 min read
Table of contents
With contemporary advances in computing hardware, together with ready access to a full fiber internet connection, it’s now commonplace for people to store all their documents (or at least backup copies of them) in ‘the cloud.’ In fact, some people don’t even keep local copies of documents and other files locally at all – they rely solely on cloud storage.
Naturally, there are pros and cons to cloud storage. Chiefly, there’s the ability to access your files from any internet-connected computer in the world just by typing a password and the facility to share a documents or file access with other people to assist in collaboration. It sure beats carrying a laptop everywhere if you don’t have to.
However, there are others who don’t like to trust the large cloud storage providers like Apple and Google to be in sole charge of their files and data. In the final analysis, there’s no one too secure to be hacked, even companies using a reliable virtual private network (VPN).
The type of people who stockpile tinned food and bottled water in their basements might say that in the advent of a third world war, foreign governments will hack into public infrastructure systems and citizens’ cloud storage to bring whole nations to a standstill.
Small wonder then that there are still those who rely on an external hard drive for backups from their primary computers and hide those devices in the garden shed or wherever.
But for the majority of folks, using the free or affordable cloud storage facilities provided by Google or Apple’s iCloud is just a daily way to keep copies of important files safe. From family photos backed up on your phone to word documents and PDFs, cloud storage is a handy solution.
Unless you pay top dollar for Google’s most expensive ‘Google One’ plan, at GBP £19.00 per month (USD $20), with 2TB of cloud storage plus a host of other bells and whistles, you’re likely, especially on Google’s basic free plan of just 15 GB, to run out of cloud storage space sometime.
To save money on upgrading to paid storage, there are some simple ways to clear up space and continue using your current subscription level. And think about it, do you really need to keep absolutely every one of those documents gathering virtual dust in a folder somewhere in the cloud?
The processes involved are different depending upon your devices linked to the cloud. In this case, let’s look at desktop machines and laptops. The process is almost identical on phones, but user experience (UX) dictates that menus and workflows will be slightly different; however, the principles remain exactly the same.
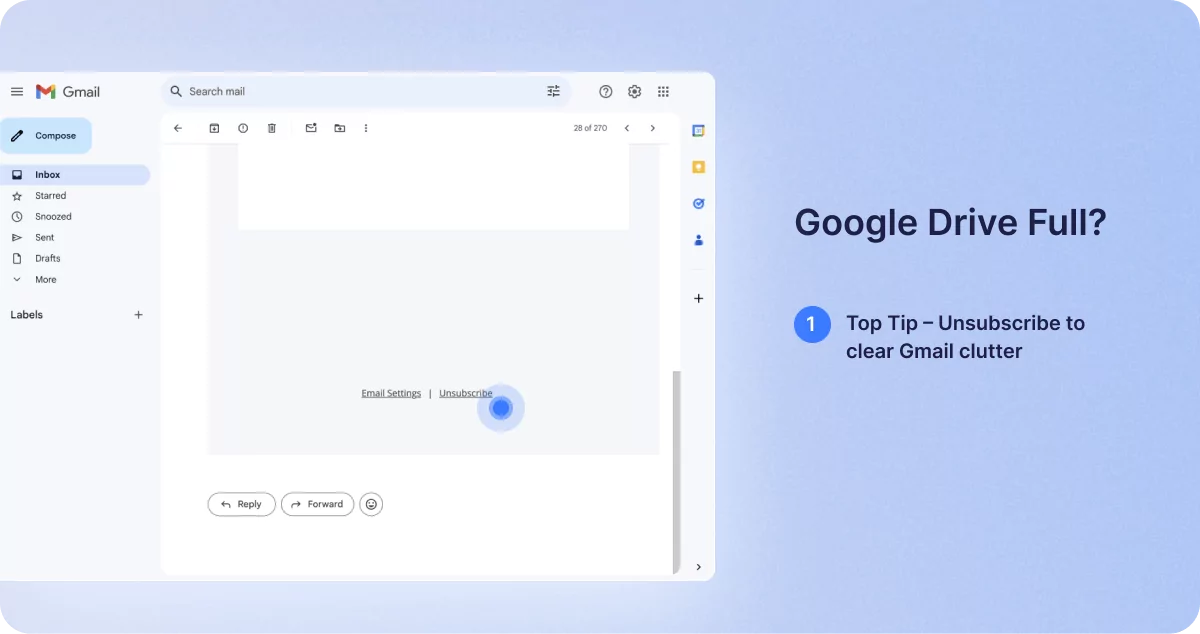
Top Tip #1 – Unsubscribe to clear Gmail clutter.
Promotions and newsletters can bombard your Gmail and soon take up lots of data storage, especially if they are ‘direct’ messages that contain images as attachments – as opposed to simple embedded textual hyperlinks, which allow you to view the newsletter online. Unsubscribing from the latter type of emails won’t really save you much space at all.
Obviously, you can use the unsubscribe link to stop receiving these emails, but if there isn’t one (which you should report to the relevant authorities as it’s illegal under privacy legislation in USA and UK and EU)- try this instead:
On your computer, in Gmail, open an email from the sender concerned. Next to the sender’s name, click Unsubscribe, then, in the pop-up, also click Unsubscribe. Some senders might require you to visit their website to log in and unsubscribe. Again, in the UK and EU, this is illegal under the General Data Protection Regulations (GDPR) which state that every marketing email must have a one-click unsubscribe facility.
To be doubly sure, once you’ve unsubscribed, you can also move the message to spam.
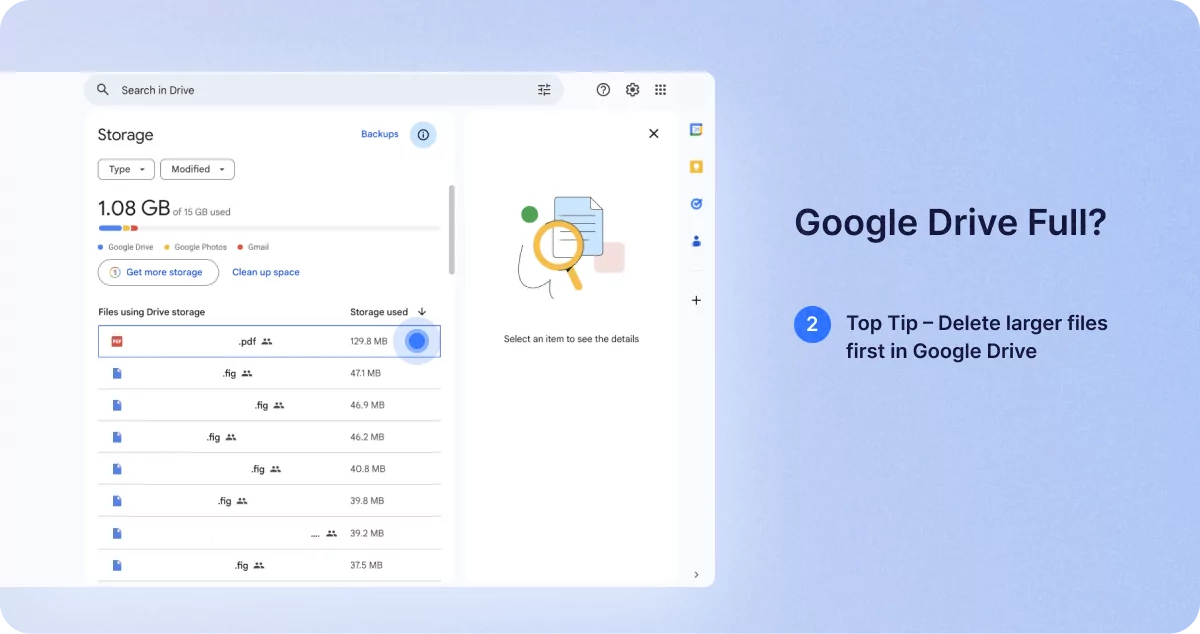
Top tip # 2 – Delete larger files first in Google Drive
Log into your Google Drive account and select the ‘storage’ option from the menu. The file list should sort from largest to smallest by default. If not, click ‘Storage Used’ and the order should display the biggest files on top.
When you’ve decided that you don’t need all five of those videos of your sister’s dog chasing a ball, select four of them and simply drag them to the trash. Keep going through all the large files and see how quickly space frees up. Remember, until you EMPTY the trash, you’ve only moved those large files from one place to another. So don’t forget to empty that bin! If you don’t, it will empty itself by default after 30 days from the item being placed in it.

Top tip # 3- Purge your pictures
Similarly, go through all your photos and delete unwanted duplicates or whatever. For future-proofing this process, you might also think about altering the settings on your camera and / or phone to produce future .jpg images smaller than the maximum available. This is because if you’re only ever going to view images on a screen, as opposed to producing large hard-copy prints of them, you only need around 150 pixels per inch resolution, rather than having images that take up some 15Mb each.
Most static images are likely to be a similar file size if they’re not videos or HDR based, so don’t bother trying to view them in order of size.
Scroll over any images or vids you might want to delete. Just click the tick-box next to the image. When all those unwanted files are selected, click the trash icon in the top-right corner of the screen.
Please note – if you enable the Backup & Sync feature on Google Photos, all the local images on your phone will also be copied and stored on Google Photos in the cloud. If you delete a photo on Google Photos, then the local photo on your phone will also be removed, and vice versa. A warning prompt should appear to remind you that you’re about to delete the images from both places.
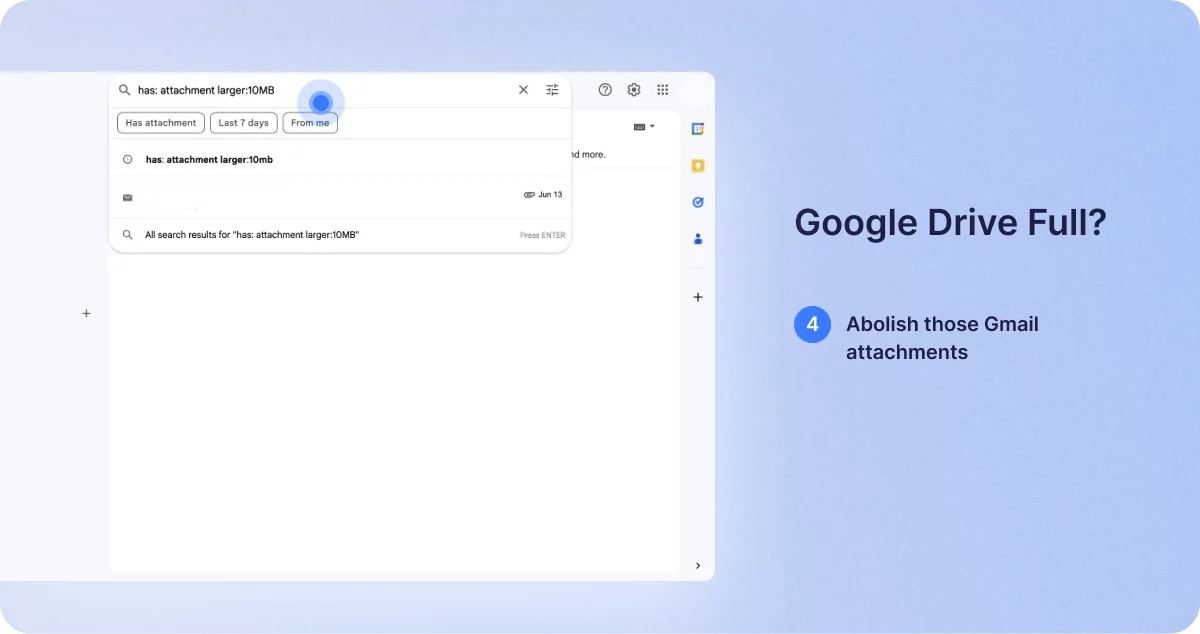
Top tip # 4 – Abolish those Gmail attachments
You can also sort your emails by size in Gmail.
Using the search bar, you can type “has: attachment larger:10MB”
Again, once a file goes to the trash, it’ll automatically delete after 30 days unless you manually empty the trash folder first.
Also, don’t forget to sort out your Gmail spam folder. It’s easy to forget about emptying the spam, but it can hold a lot of data you don’t need. In the spam folder, simply click ‘delete all spam messages now’. Simple!
In summary, before you take the plunge and opt to pay Google for more storage space, try the tips above and you might be pleasantly surprised how much virtual room you can create, then continue using your free or current package.
Similar posts
02.01.24
4 min read
1Click VPN Team